Ping Sensor IOT Trigger using Enc28j60
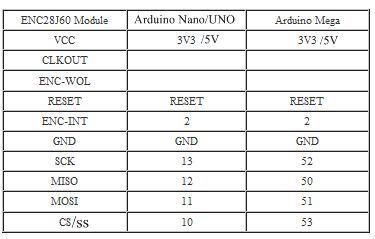
This card need to be powered by 3.3V (from Arduino pin or to 3.3V power adapter). The card is connected with following pins:
Arduino Nano
|
Ethernet card
|
3.3V
|
VCC
|
GND
|
GND
|
D10
|
CS
|
D11
|
SI
|
D12
|
SO
|
D13
|
SCK
|
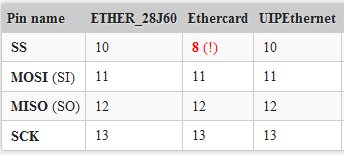
Information about the enc28j60
Test Sketches
https://codebender.cc/sketch:86946 Ping Tester
https://codebender.cc/sketch:86949 TCPClient UIPEthernet emc28j60 test sketche
Send SMS from Arduino over internet using enc28j60 and thingspeak and twilio
(cost money)
Other ideas to send SMS -
IoT websites that might have ways to do this:
And maybe LitHouse and IFTTT
Working prototype using PushingBox and Newtifry
What does does is trigger when the distance seen by the Ultrasonic sensor is at the trigger distance or greater.
This takes a little bit of setup to get working, it not hard, but might be confusing the 1st time around.
I used newtifry because I own Android devices, the setup for iOS or Windows Devices should be similar.
Newtifry app can be found here:
What is Newtifry?
Newtifry is a notifications system that uses push notifications instead of the more traditional SMS. It's designed for system administrators, and especially those running their own personal monitoring systems who otherwise don't want to spend the money on SMS monitoring. The messages are intended to be short and just to let you know of problems. Newtifry can also read out the incoming messages using the text to speech service, for extra wake up power at 2AM in the morning.
Once a user creates a notification source, it is assigned a 32 bit hash. This can then be given to an application to send messages to the device via the Newtifry API (a simple REST API). The source can have separate notification settings on each device, allowing users to choose how urgently they need to deal with the notifications.
A matching backend site routes notifications to phones. You can also log into the website to view recent messages, manage sources, or see which devices you have connected to the service.
Limitations of Newtifry? 1440 Messages a day - anything more will be ignored.
What is pushingbox?
One API for all your notifications.
PushingBox is a cloud that can send notifications based on API calls.
From one request, you can send several notifications like a Push, a Tweet, an Email... All this in real time.
Pushingbox provides ways to “talk” to IFTTT, Arduino, Spark Core, Email, etc.
The Services it provides - also include iOS devices, and Windows Devices. Even a way to talk to Firefox, and Chrome browsers.
So to setup this up - you will need a ENC28J60 ethernet module, a UltraSonic Module, and a Arduino Nano USB.
See the above for how to wire the ENC28J60.
Of course a UNO and WIZNET 5100 Shield and UltraSonic can be used as well, but some changes to the code will need to be made for the WizNet
Speaking of the code - Pushingbox provided a sketch that my code is based off of. I think there sketch was sending tempatures? Not sure - important part is they provided code to work with their service.
And the really important part - is in the 1st few lines of code.
////
//
// General code from http://www.pushingbox.com for Arduino + Ethernet Shield (ENC28J60)
// Library EtherCard from https://github.com/jcw/ethercard is under mit license
//
////
#include <EtherCard.h>
#include <NewPing.h>
/////////////////
// MODIFY HERE //
/////////////////
static byte mymac[] = {0x24,0x99,0x46,0xAD,0x30,0x31}; // Be sure this address is unique in your network
//Your secret DevID from PushingBox.com. You can use multiple DevID on multiple Pin if you want
//char DEVID1[] = "vC72444954369211"; //Scenario : "The mailbox is open"
char DEVID1[] = "v69FA955A014BD2D";
(I think all that needs to be changed if you are using a WizNet 5100 shield is the library, but don’t hold me to that)
The EtherCard.h library is suppose to be a direct drop-in replacement for the ethernet library provided for the Wiznet 5100 devices. They claim that 90% of the sketches written for Wiznet 5100 will work with no other changes. (I haven’t tested that out, but it seems reasonable they wanted something just as easy to use as the WizNet in a smaller package)
You will see a line that says:
char DEVID1[] = “xxxxxxx”;
This is probably the most important line in the code - this need contain your device id.
The rest of the code, gets IP addresses, checks for distances, and sends information to pushingbox.
We need to know how to get the device ID.
Step One:
Install your service (Newtifry in my case) on your device. (Pushingbox supports eMail, Twitter, Safari, Karotz, Prowl, Faast, Pushalot, Toasty, Notify My Android, Newtifry, Pushbullet, and a CustomURL for your own service) Setup for different services will be different, but should be similar.
Step Two:
You have to open the Newtifry App, log in with your gmail account, and accept terms, etc.
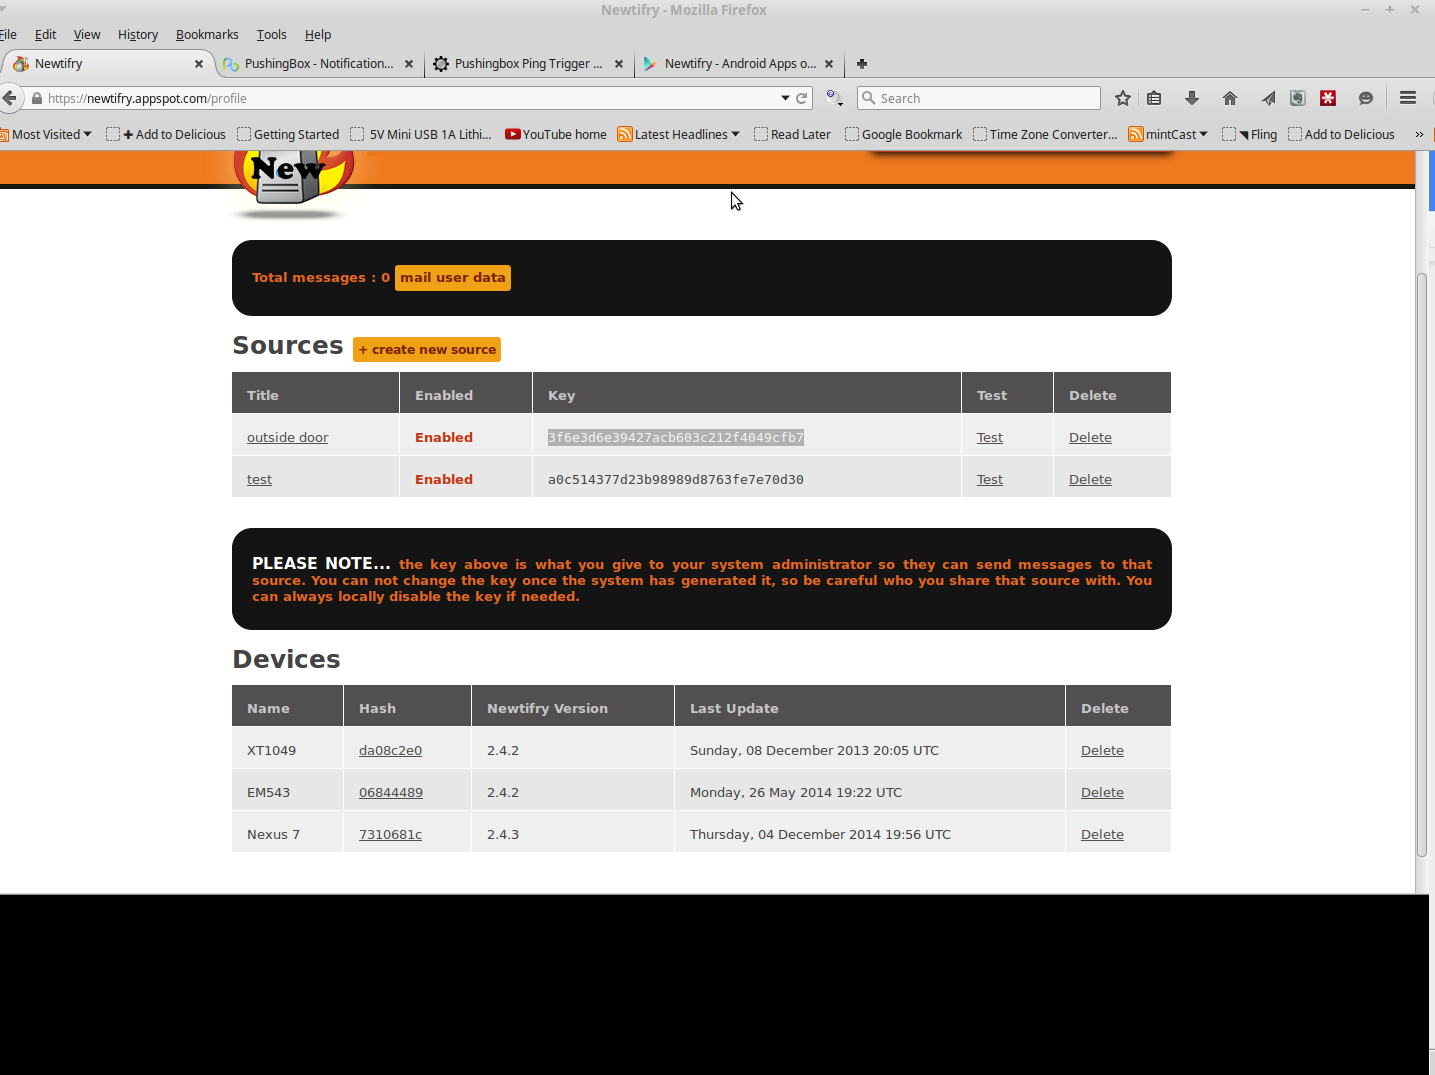
Once you have done that, you can goto the Newtifry website
Log in on the website, and you should see a list of your devices
You can have more than one device setup to receive the notifications.
You should see something that looks like this:
Step Three:
In the middle of the page you’ll see “Sources” and “Create new Source”,
click on “Create New Source”, a screen will then ask you for a title.
The Title can be anything you’d like - since we are doing a door, lets call it “outside door”
Besure to click the “Enabled” button, and then the save button.
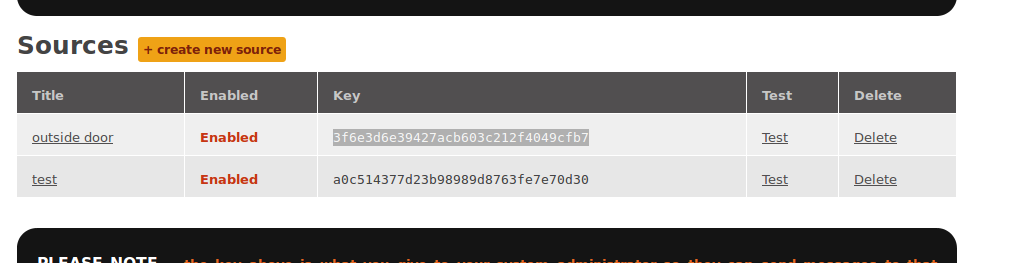
Now on your profile page you should see at least one “Source” listed.
along with a number - you’ll want to select that number and copy it in to the buffer.
If you like at this time you can click on the “test” button and this should send a “test message” to your device, it’s probably a good idea to do this since this is your 1st time setting this up.
It might take a minute or so to get the message depending on many different factors, but if you don’t get it after about 5 mins, go back and check everything again.
Step Four:
Setting up Pushingbox. Log into pushingbox
http://www.pushingbox.com using your gmail account.

Click on “My Services” - you probably will not have any services, so you’ll need to add one,
click on “Add a Service”
And find “Newtifry” in the list - click on “Select This service”
A popup will slide down:

Here you name your service - Again it can be any name you want but probably should be something you’ll know what it is when you look at it.
Call it - “outside door trigger”
The source (API key) is that long number we copied from Newtifry - so, “paste” it in to that block.
And click “Submit” - you have just created your service.
Step Five:
Now you need to create your Scenarios - in other words, you need to tell Pushing box what to do when it gets a “trigger”
Click on “My Scenarios”
There is a block in the middle of the page called “Create a scenario or add a device”
Type in a Scenario Name, and click on Add - again the name can be anything you want.
“Trigger Door Open” or “Ping Trigger” (Ping is our device) that will trigger the “outside door open” alert.
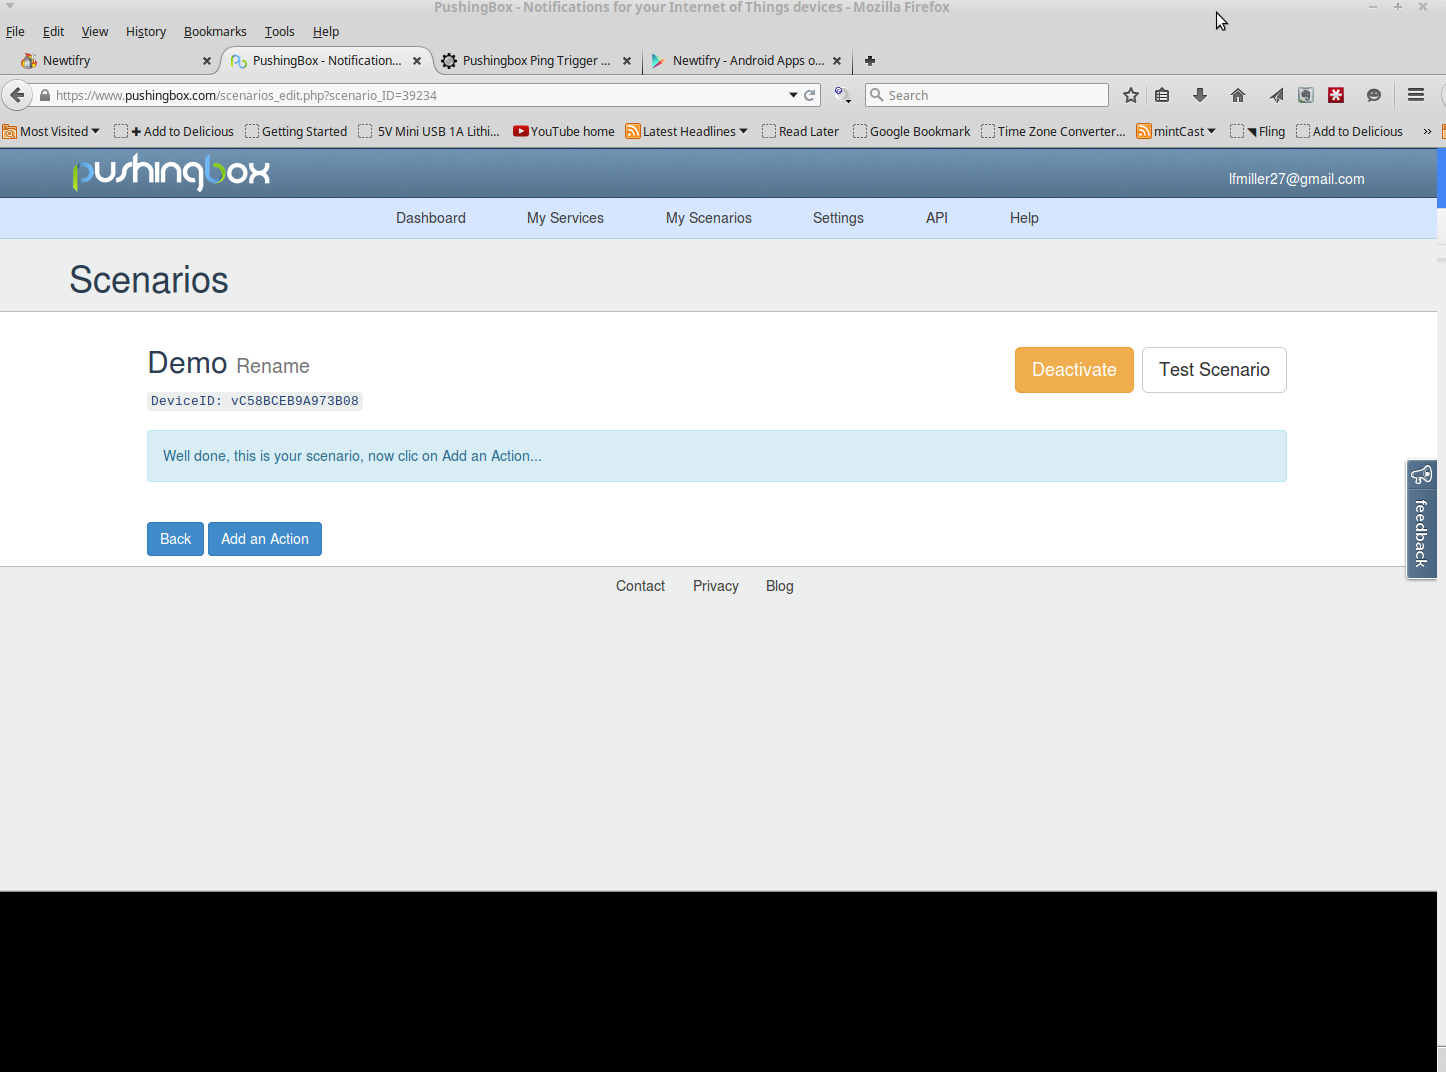
You should see the above when you create a new scenario - at this point Pushingbox will give you the DEVID number you’ll see it next to “DeviceID” usually it starts with a lower case “v”
But Pushingbox still doesn’t know what you want it to do with the scenario. So you need to “add an action” - click on “add an action”
And you’ll see a list of your “services” -
find the “outside door” service in the list and click on “add an action with this service”
A slide down window will now ask for a “Title” and a “Message”
Once again, these can be anything you want - Since we are watching a “Outside Door”
the title will be “Outside Door” and the message will be “The Door is open”
Click Submit.
You’ve just created your trigger, all you need to do now is copy and paste the device ID from pushingbox into your Arduino Sketch and upload that to the Arduino.
Step Six
Once the code is running on the Arduino, open the “Serial Monitor” you should see it asking you to hit a key to setup default values the ping sensor will look for to decide if the “trigger” has moved or changed. In this case we are talking about a “outside” door, but the sensor can really be used to watch anything you don’t want moving.
So the 1st trigger the sensor is looking for is how close the object is when it’s in place (IF the door is closed, how close is it)
and the 2nd trigger is how far away can it see if the object is moved (or IF the door is open)
It uses those two values to decide if something has changed. Anything Greater then the 2nd trigger will send a message to pushingbox, which in turn will send a message to newtifry (in this case), which in turn sends a message to your device… Most of the time this works in Near Real Time, and you’ll hardly notice a delay.
Newtifry does get backed up from time to time and every once in a while I see a great delay on the notification, still it works and is a free service.
No comments:
Post a Comment